In the default settings of Excel, numbers in cells align to the right and text to the left.
You may need to change these settings in some instances to make your work easier to read and follow. One way you can do this is by adding indents or increasing indents to your dataset and in some cases removing some or all the indents from your dataset.
When you increase indents, you move the cell contents away from the cell border and when you decrease or remove indents, you move the cell contents closer to the cell border.
Indents make your dataset easier to read and follow
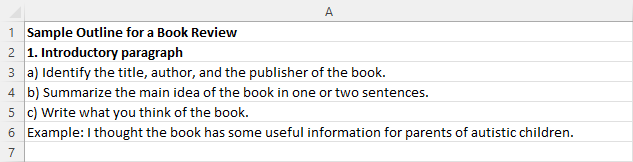
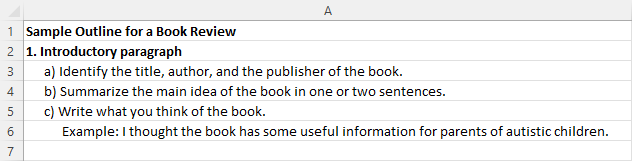
When you look at the following examples, you can see that the dataset without indents is difficult to read and follow but the one with indents is much easier.
Example of a dataset without indents
Example of a dataset with indents
Way of Adding, Increasing, or Removing Indents
In this tutorial, I will show you the following five ways you can use to add, increase, or remove indents in Excel. You can apply some or all of them depending on your situation.
- Use the Increase Indent and Decrease Indent buttons.
- Use the Keyboard shortcuts Alt + H, 5 and Alt + H, 6.
- Change the Horizontal Text Alignment in the Format Cells dialog box.
- Use Excel VBA code.
- Execute the Clear Formats command.
I will take you through all of them.
Use the Increase Indent and Decrease Indent Buttons
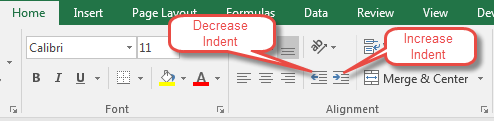
The Decrease Indent and Increase Indent buttons are in Home >> Alignment on the Excel ribbon.
To Add and increase Indents, carry out the following steps:
- Select the range where you want to add and increase indents.
- Click Home >> Alignment >> Increase Indent. Click once or more times depending on how many indents you want to add to your dataset.
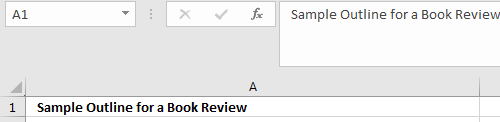
In the following example, I have added one indent in cell A1 by clicking the Increase Indent button once.
In the following example, I have increased the indent in cell A1 five times by clicking the Increase Indent button 5 times.

To remove indents, follow these steps:
- Select the range where you want to remove the indents.
- Go to the Home Tab and click on the Decrease Indent button once or several times to completely remove the indents, depending on how many indents your dataset has.
In the following example, I have removed all the six indents I had put earlier by clicking on the Decrease Indent button six times.
Use the Indent Shortcut
Another way you can add, increase, or remove indents is by using the keyboard shortcuts Alt + H, 5 and Alt + H, 6.
To add or increase indents do the following:
- Select the range to which you want to add or increase indents.
- Press the Alt key. The Excel Ribbon will then appear as follows with numbers 5 and 6 under the Decrease Indent and Increase Indent buttons respectively.
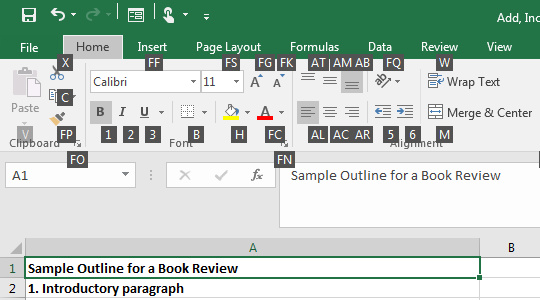
- Press the 6 key on your keyboard once to add one indent.
In the following example, I have pressed the 6 key one time to add one indent in cell A1.
Using this shortcut, you can only add one indent at a time. If you want to add one more indent, you will have to use the shortcut Alt + H, 6 again. You can repeat the process many times depending on how many indents you want to add to your work.
To remove indents, do the following:
- Select the range from which you want to remove indents.
- Press the Alt key again. Your Excel sheet Ribbon will then appear as follows with numbers 5 for decrease and 6 to Increase Indent.

- You will then have to press the 5 key on your keyboard once to remove one indent. In the following example, I have pressed the 5 key once to remove the one indent I had added earlier in cell A1.
Using this shortcut, you can only remove one indent at a time. For example, if your dataset has 5 indents and you want to remove all of them, you will have to repeat this process 5 times.
Change the Horizontal Text Alignment
You can also add, increase, or remove indents by changing the settings of Horizontal Text alignment in the Format Cells dialog box.
To add or increase indents, do the following:
- Select the range to which you want to add or increase indent.
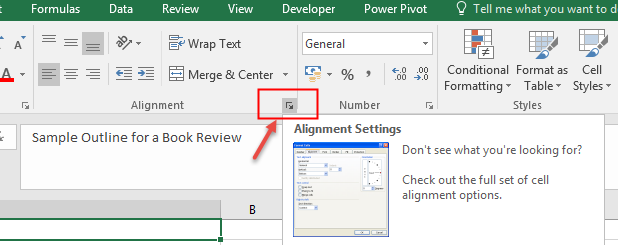
- Click on the Alignment Settings dialog box launcher as shown below.
The following Format Cells dialog box will come up with the Alignment tab selected.
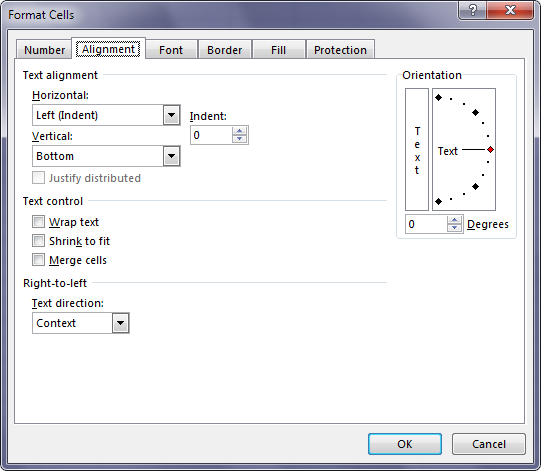
- In the Horizontal list box, select Left (Indent).
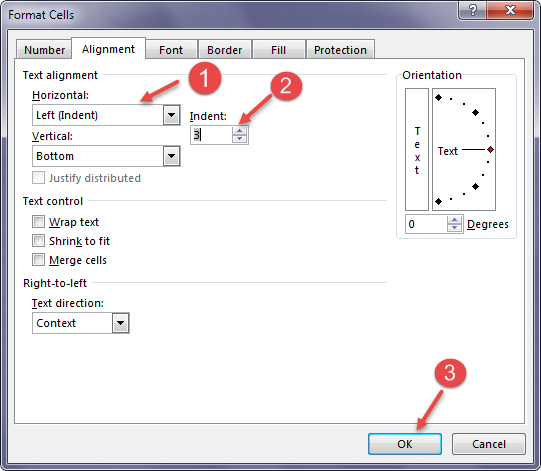
- In the Indent Spinbox, key in the number of indents you want or use the up and down arrows to input the number of indents you need, and then press OK to apply.
In the following example, I have input 3 indents.
To remove Indents, do the following:
- First, select the range of your dataset from which you want to remove indents.
- Click on the Alignment Settings dialog box launcher.
- In the Alignment Settings, input 0 (zero) in the Indent box and then click OK to apply the settings. This will remove all the indents from your dataset.
If you intend to reduce the number of indents, you can input a smaller number than the number of indents that have already been applied to your dataset. For example, if your dataset has 4 indents, you can input 2 in the Spinbox to remove 2 indents from your dataset.
Use the Excel VBA code
If you have a working knowledge of Excel VBA, you can input the following code in one of the modules in your Excel workbook. Open VBA Editor by using Alt + F11 and enter the following code.
|
1 2 3 4 5 6 7 8 |
Sub AddIndent() Dim myInt As String myInt = InputBox("how many indents you want to add?", "Add Indent") If Not IsNumeric(myInt) Then Exit Sub If myInt < 0 Then myInt = 0 Selection.IndentLevel = myInt End Sub |
Code Analysis
The myInt variable is declared as a string. This is made because when you close the window, the variable from the InputBox takes “” as a value. If the variable is declared as Integer, then the code will return the error message.
If a user enters text into the textbox, instead of a number, the IsNumeric function will exit the sub without returning an error.
The Selection.IndentLevel is set to the number entered in the field. If the number is lower than 0, the number is changed to 0.
Code Execution
When executed, this code will change indent(s) to the number you select.
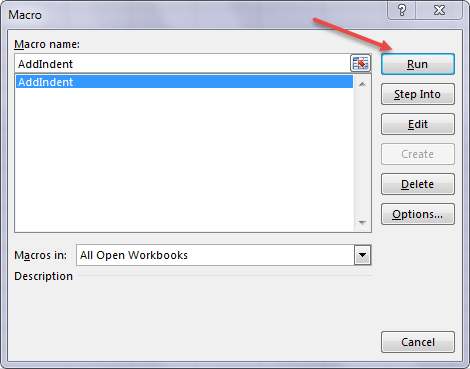
Before you run this code, select the range to which you want to change indents. Then press Alt + F8 to open the macro dialog box. The following macro dialog box will appear, showing the AddIndent macro (VBA code) you created. Select it.
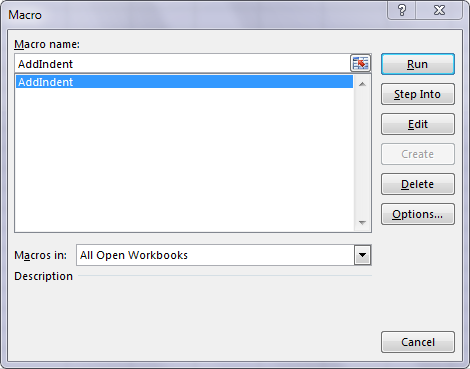
Click on the Run button to execute the code.
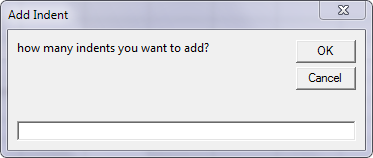
The following dialog box will appear asking you to input the number of indents you want for your data set.
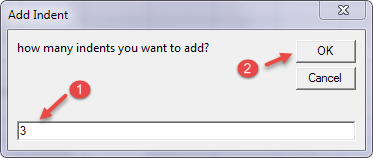
Input the number of indents you want to add, then click on the Ok button to apply.
In the following example, I have input 3 indents to apply to my dataset.
You can also check our article on how to assign a keyboard shortcut to a macro.
Use the Clear Formats command
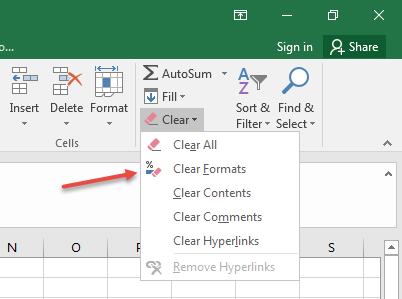
You can use the Clear Formats command in the Editing group. This command will remove all indents from your dataset. This is because the indents are part of the formatting of your data range.
- Select the range you want to remove indents from.
- Go to the Home >> Editing >> Clear >> Clear Formats.
All formatting, including indents, will be removed from your dataset.