Standard text boxes in Excel are static. It means the values in them do not change until or unless you change them. This tutorial shows you how to create dynamic text boxes in Excel. The values in dynamic text boxes change automatically to reflect the changes in linked cells.
How to create dynamic text boxes in Excel
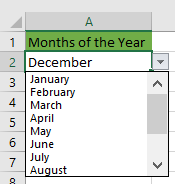
We will use the following drop-down list to show how to create a dynamic text box. The values in the text box will change to reflect the changes in the list box.

We use the following steps:
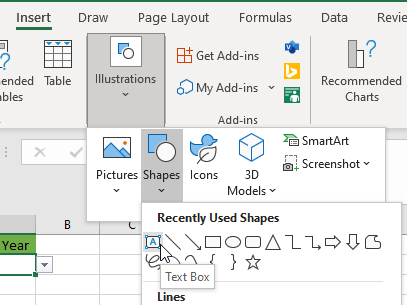
- Click Insert >> Text >> Text Box.

Or
Click Insert >> Illustrations >> Shapes >> Text Box.

- Hold down the left mouse button and drag to draw a text box near the drop-down list.

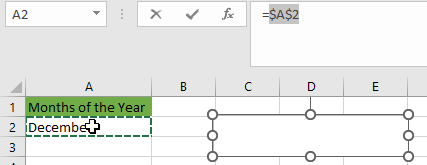
- Click inside the text box to select it. The text box has handles on its border to show that it is active.

- Click in the formula bar and type an equal (=) sign then click cell A2 that we want to link.

- Press Enter.

The value in the text box changes to reflect what is selected in the list box. Select another month in the list box and the text box is updated.

Note: You can add static explanatory text in the text box to explain the changing values. You do the following:
- Double-click the text box and move the cursor to the beginning of the value that is there.
- Type in the descriptive text for example, “The month is:”

Now when you select different months in the list box the months displayed in the text box change. But the explanatory text remains static:

Conclusion
In this tutorial, we have explained how to create a dynamic text box by linking it to a cell. We have also shown how to add static explanatory text in the dynamic text box. This is to explain the changing values.
