Comma Separated Value or CSV files are text files in which items are separated by commas and line breaks.
Sometimes we need to import a CSV file into Excel for modification and analysis.
In this tutorial, we will explore four different methods we can use to import CSV with headers into Excel.
How to import CSV files with headers into Excel
In this tutorial, we will learn three methods we can import CSV files with headers into Excel.
Method 1: Text Import Wizard and Convert Text to Columns Wizard
The most popular way of importing CSV files into Excel is the use of the Import Wizard. To apply this method we use the following steps:
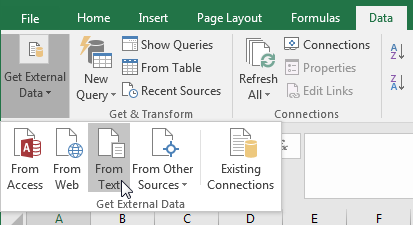
- Click Data >> Get External Data >> From Text:
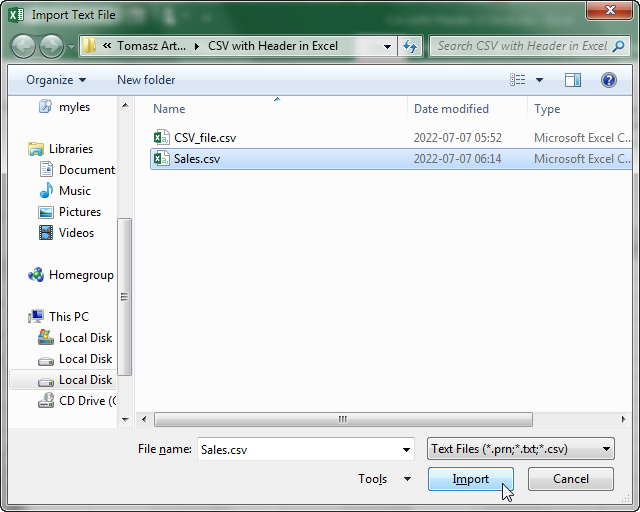
- In the Import Text File dialog box we select the file we want to import and click the Import button:
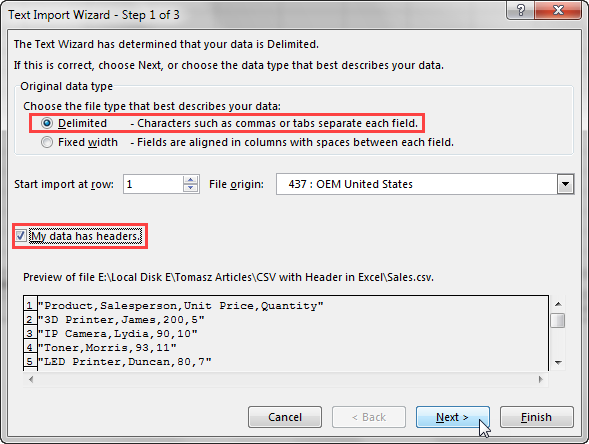
- The Import Text File dialog box pops ups and will take us through 3 steps. We can see a preview of the selected file. In the first step we select the Delimited and My data as headers options and then click the Next button:
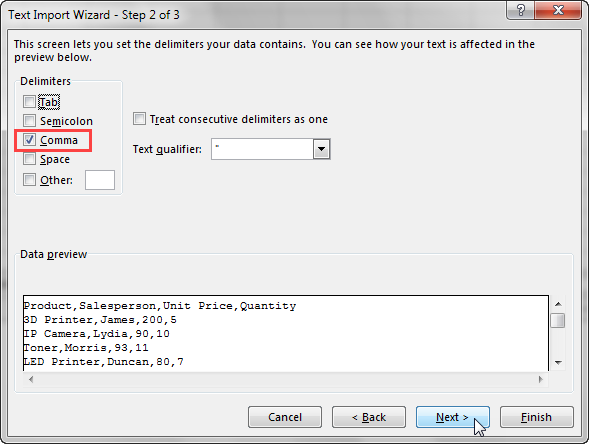
- In the second step, select Comma under Delimiters and click Next:
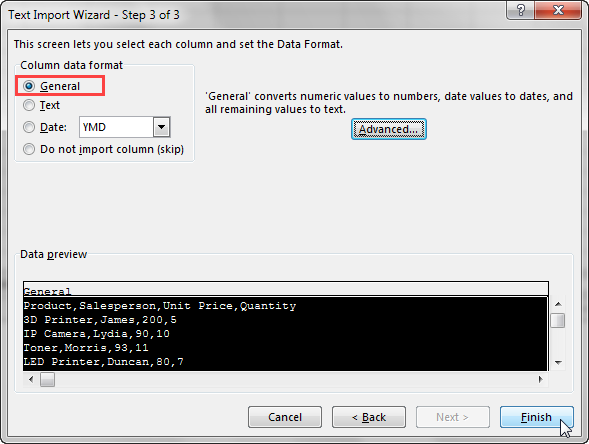
- In the third step, select General under Column data format and click Finish:
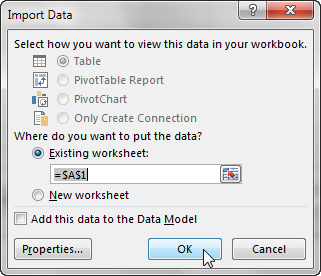
- In the Import Data dialog box, we select where we want to put our data and click OK:
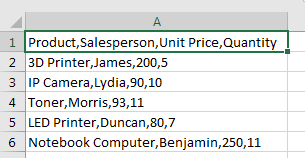
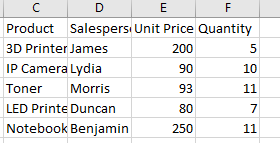
The data is imported but it is all in one column:
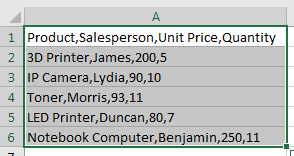
To separate the data into several columns we first select the dataset:
Then do the following:
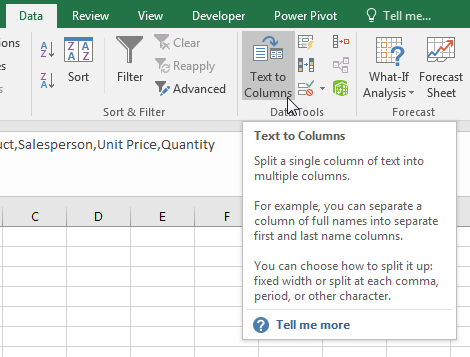
- Click Data >> Data Tools >> Text to Columns:
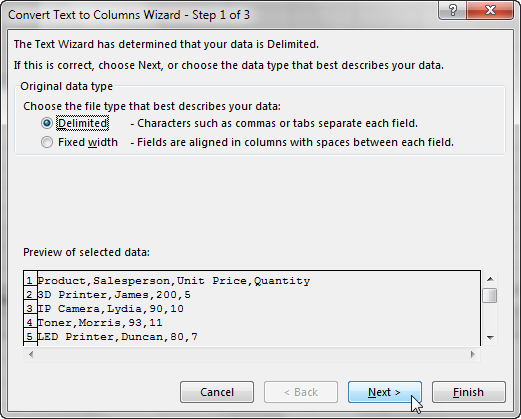
- The Convert Text to Columns Wizard pops up. It will take us through 3 steps. In the first step select Delimited and click Next:
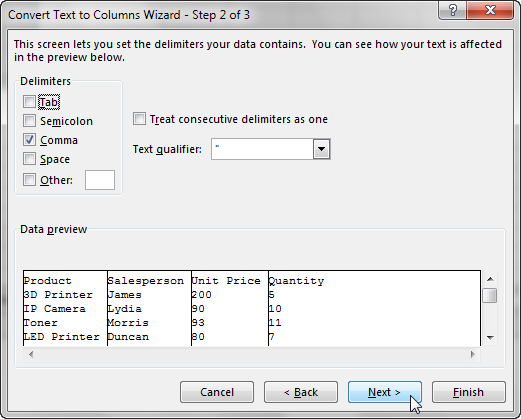
- In the second step, under Delimiters select Comma and we can see the preview of the data separated into several columns. Click Next:
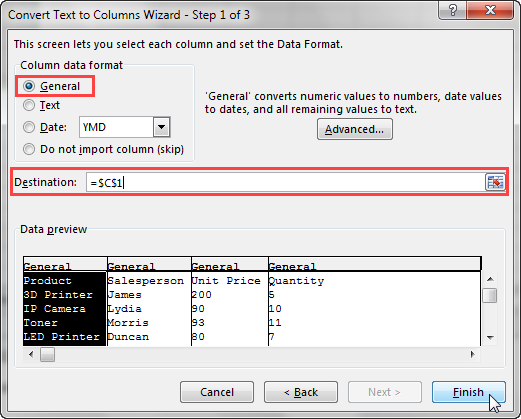
- In the third and final step, select General under Column data format and the destination where we want the data to be placed, and then click Finish:
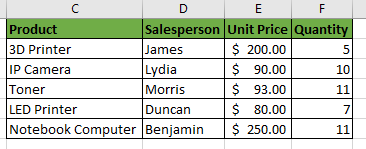
The dataset is placed in the selected destination range of the worksheet:
We can now format the data to our liking, for example, we can increase the column width of the columns, change the data format of the Unit Price column to Currency, and so on.
Method 2: Power Query
Power Query is a powerful data automation tool in Excel. It allows us to import data into Excel from external sources such as CSV files. It has powerful capabilities that we can use to clean and transform the imported data.
We use Power Query to import the CSV file into Excel by using the following steps:
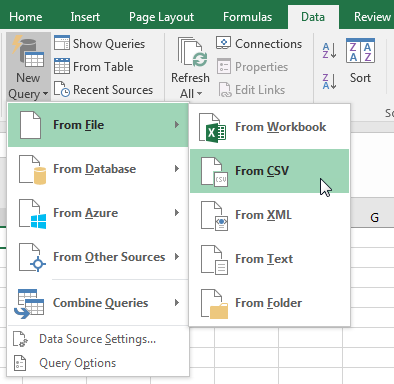
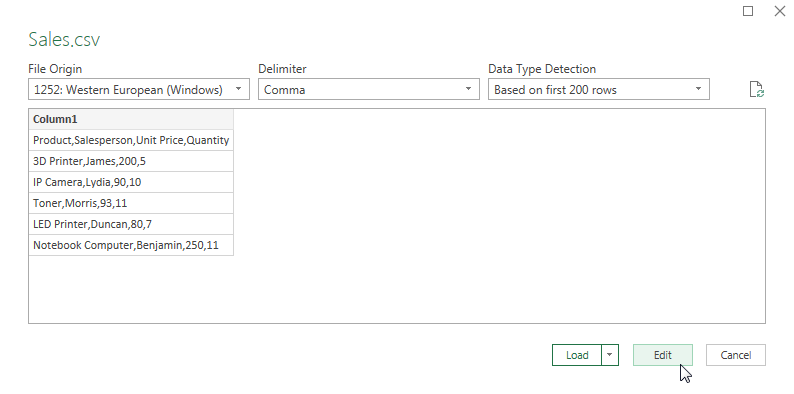
- Click Data >> Get & Transform >> New Query >> From File >> From CSV:
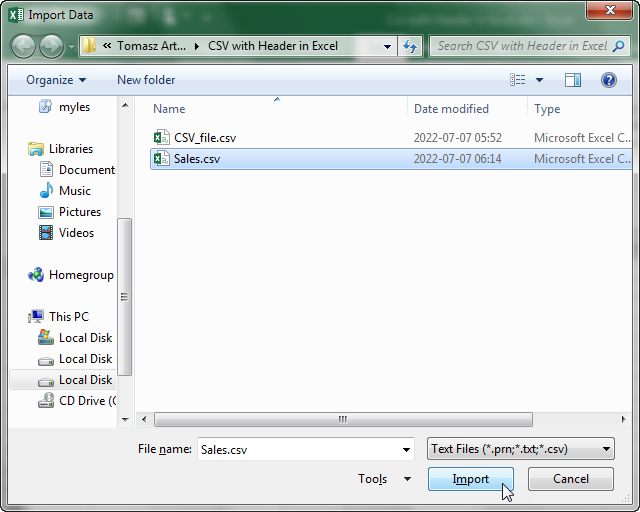
- In the Import Data dialog box, select the CSV file we want to import and click Import:
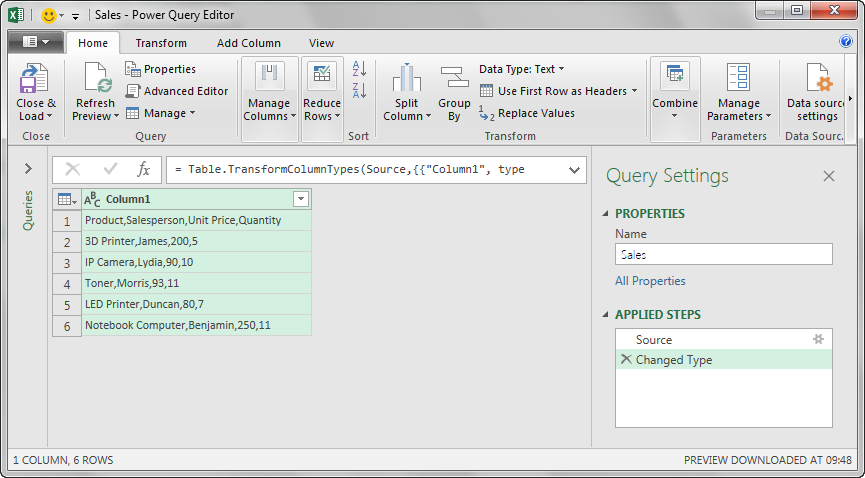
- Click Edit in the dialog box that pops up to open the Power Query Editor:
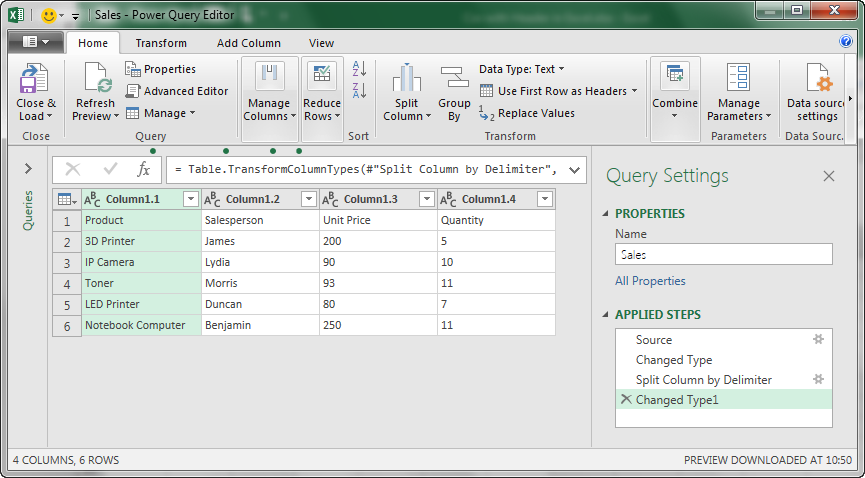
- In the Power Query Editor, we need to split the data into several columns and set the first row as the header.
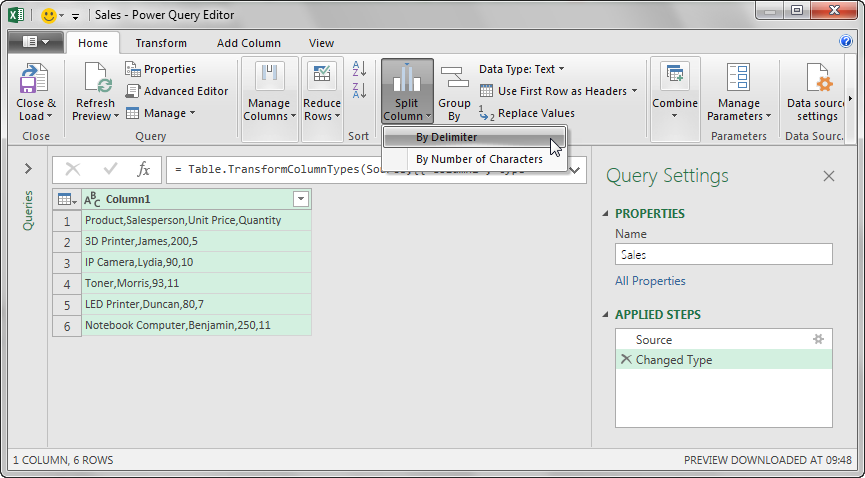
- Click Home >> Transform >> Split Column >> By Delimiter:
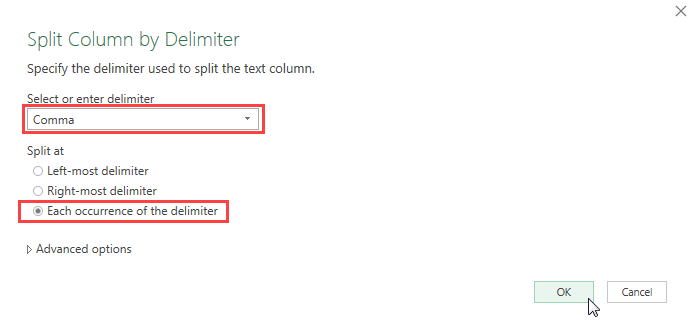
- In the Split Column by Delimiter dialog box, select Comma in the Select or enter delimiter drop-down box and select Split at Each occurrence of the delimiter, and click OK:
The data is split into columns:
- To make the first row a header click Home >> Transform >> Use First Row as Headers:
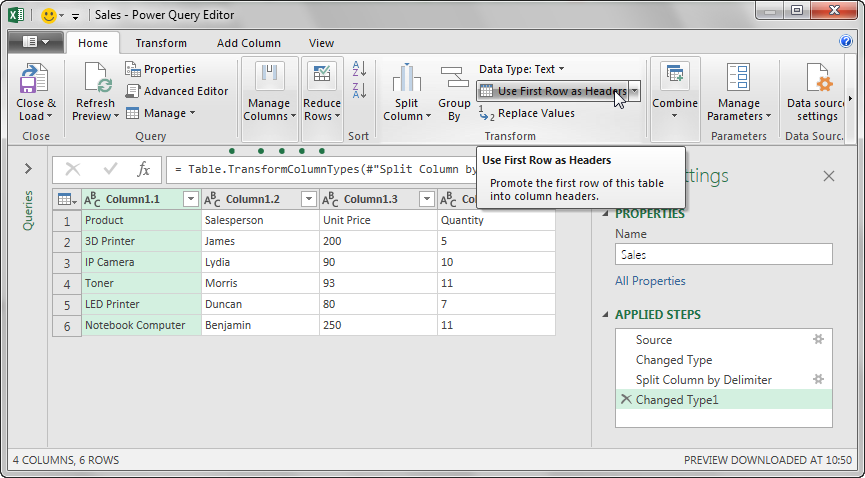
The first row is promoted into column headers:

- Click Home >> Close >> Close & Load:
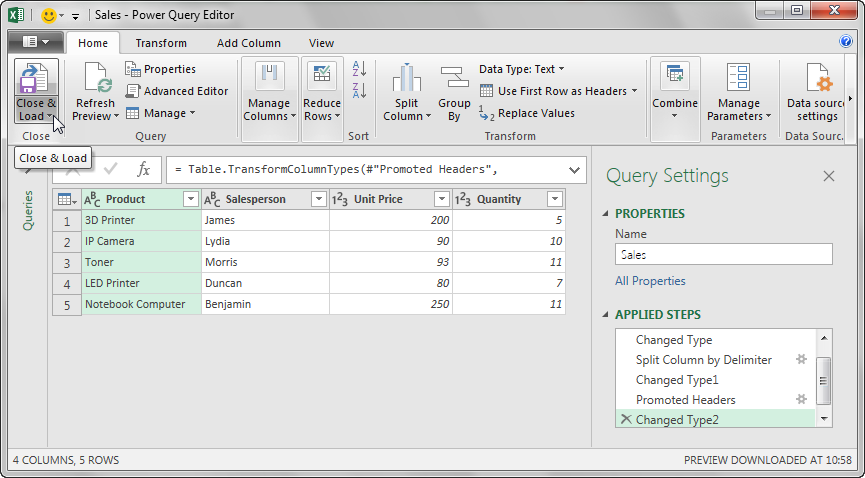
The data is imported into a separate worksheet.
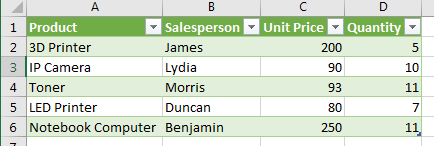
We can cut the table and paste it in our preferred location and format it further according to our requirements.
Method 3: Open command and Text to Columns feature.
If we want to open the CSV file, we have to ensure that in the Open dialog box we select Text Files in the drop-down box shown below:
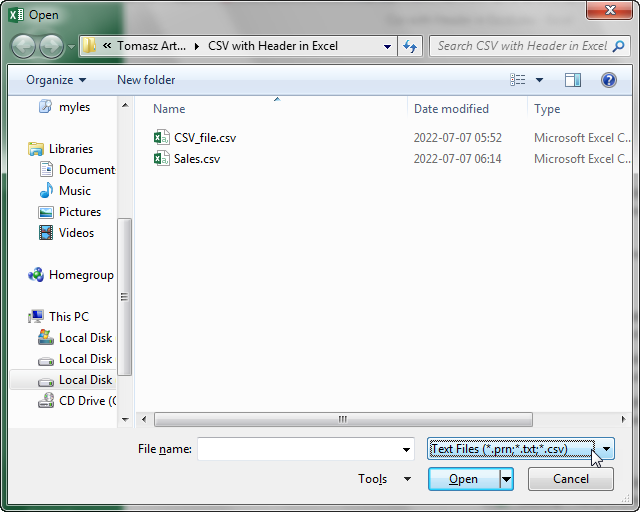
Select the CSV file we want to open and click Open. When we open the CSV file in Excel, all the information is in one column:
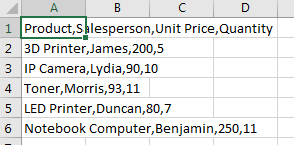
But this is not what we want. We cannot do any analysis on this data using the tools in Excel when all the data is in one column.
We want each item listed in a single cell across a row, and when the CSV file reaches the end of a line, Excel places the items after that into the next row.
To distribute the data into several columns we do the following:
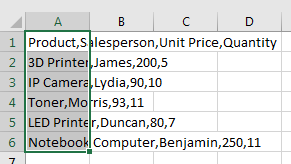
- Select the data that is imported into a single column:
- Use the Text to Columns feature to split the data into separate columns as explained previously in Method 1.
The data is split into columns:
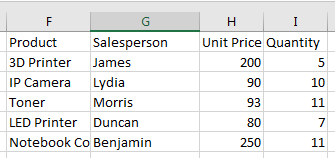
We can then modify the data according to our requirements.
Method 4: Excel VBA
In this method, we will use Excel VBA to import the CSV data into a worksheet and separate them into rows and columns according to the comma delimiter.
We use the following steps:
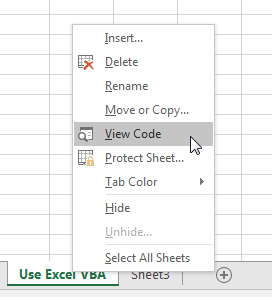
- Right-click a worksheet and select View Code from the shortcut menu:
- Copy and paste the following code in the worksheet’s code window:
|
1 2 3 4 5 6 7 8 9 10 11 12 13 14 15 16 17 18 19 20 21 22 23 24 25 26 27 28 29 30 31 32 33 34 35 36 37 38 39 40 41 42 43 44 45 |
Sub ImportCSV2XL() 'Declare variables Dim FileLocation As Variant Dim Currentbook As Excel.Workbook Dim CurrentSheet As Excel.Worksheet Dim Myrng As Range, TextLine As String Dim row As Long, column As Long Dim iL As Long, jL As Long, aryStr() As String, a As Variant 'Assign the active workbook to the Currentbook variable Set Currentbook = Excel.ActiveWorkbook 'Set the location of the CSV file using the GetOpenFilename application method FileLocation = Application.GetOpenFilename("CSV (Comma Separated) (*.Csv),*.Csv" _ , 1, "Select the file", , False) 'Display the path of the csv file MsgBox FileLocation 'Prompt the user the cell reference of where to place the data Set Myrng = Application.InputBox(Prompt:="Pick the Sheet & a Cell", Type:=8) Myrng.Parent.Parent.Activate Myrng.Parent.Activate row = Myrng(1).row column = Myrng(1).column Close #1 iL = row Open FileLocation For Input As #1 Do While Not EOF(1) Line Input #1, TextLine aryStr = Split(TextLine, ",") jL = column For Each a In aryStr Cells(iL, jL).Value = a jL = jL + 1 Next a iL = iL + 1 Loop Close 1 End Sub |
- Place the cursor anywhere in the code and press F5 to run it.
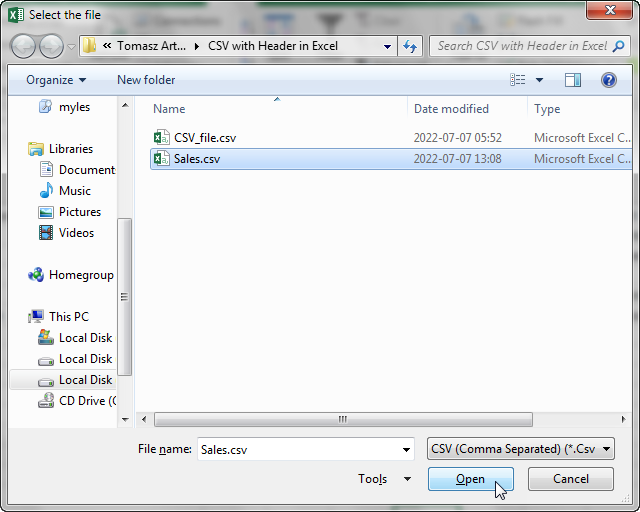
- In the Select the file dialog box that pops up select the CSV file we want to import and click Open:
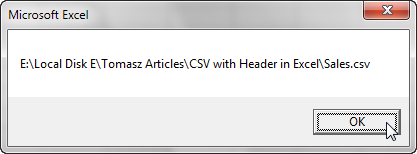
- A message box displaying the path of the CSV file pops up. Click OK:
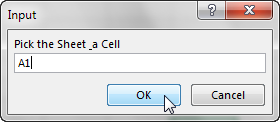
- Type the cell reference for where we want the data to be placed and click OK:
The data is imported into the worksheet:

Conclusion
Comma Separated Value or CSV files are just text files in which data items are separated by commas and line breaks.
Many times we need to import CSV files into Excel so that we can modify and analyze the data using Excel tools.
In this tutorial we have looked at four different methods we can use to import CSV files with headers into Excel: Use of Power Query, use of Text Import and Convert Text to Columns Wizards, use of the Open command and Text to Columns feature, and the use of Excel VBA.