Excel has a lot of useful date features, but to use them, you have to know how this program stores dates.
Excel is storing every data as numbers, and you can only use formatting to change the numbers to dates. The first number is, of course, number 1, and this represents January 1, 1900, while the last number for dates is 2958465, and this number stores December 31, 9999.
Now, knowing how it works, we must be aware that we have to convert numbers by formatting to get the date. We will show how this could be done as fast as possible.
Using Shortcut to Format Date
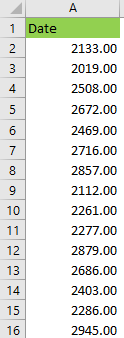
In our example, we have a list of 15 random numbers that we will convert to dates.
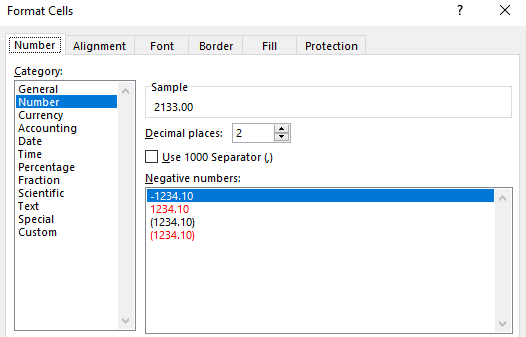
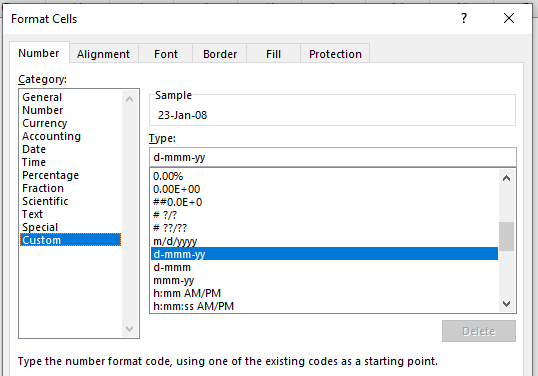
When we open up the Format Cells window, we can see that the cells are formatted as numbers:
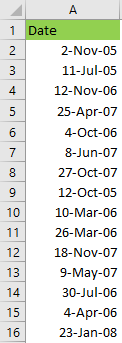
To change these numbers into dates in the most efficient way, we have to select all the numbers in our range and press CTRL + SHIFT + #.
When we do this, our range will automatically be changed. Now, our table looks like this:
In the Format Cells window, we can see that our range is now formatted as d-mmm-yy.
Using VBA to Format Date
Perhaps an even more convenient way to format our cells as dates would be to create a code in VBA that would do this for us.
The code itself is pretty simple:
|
1 2 3 4 5 6 |
Sub DateFormat() With Selection .NumberFormat = "dd/mm/yyyy" End With End Sub |
We do not have any variables. There is “With selection” which defines that for each time we select the cells and use our code, the range in the selected cell gets formatted to “dd/mm/yyyy”. Of course, we can adjust this format to our liking.
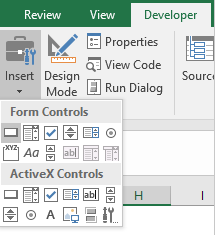
For purposes of this example, we formatted our range as numbers again, saved the Workbook as a Macro-Enabled one, and we created a Form Control in which we assigned our code.
Now, to do this, you have to go to the Developers tab, select Control >> Insert >> Form Control, and choose the first one on the list:
Once we click on it, we have to choose the destination for our button. When we do this, a pop-up window will immediately appear:
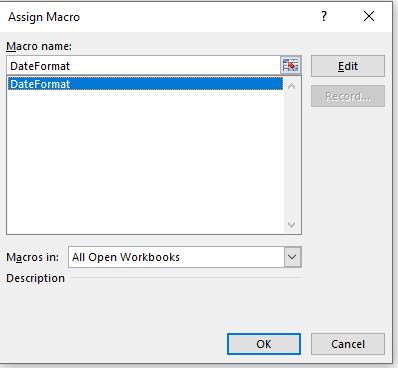
We will select our Macro- DateFormat and then click OK.
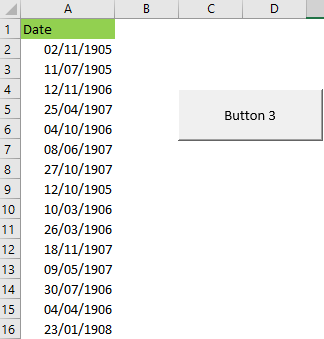
We will be shown a picture of a button:
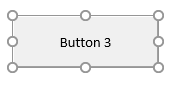
Remember one thing: Until the button is selected, we can change its name. If we deselect it and click on it, it will run our code. We will leave the name to Button 3.
We now have to select our range and click on the button that we created.
Once we do that, our range will be formatted in our desired format: