Excel can be very helpful in terms of analytics, extraction, and presentation of data. It can also be very informative when we want to figure out certain metrics of our file, or range.
In the example below, we will show you how to inspect the size of a range in Excel.
The size of the range can mean various things. In the simplest terms, it encompasses the width and height of a certain range. We can also speak in terms of the count of cells, rows, and columns.
Inspect the Number of Cells, Rows, and Columns of a Range
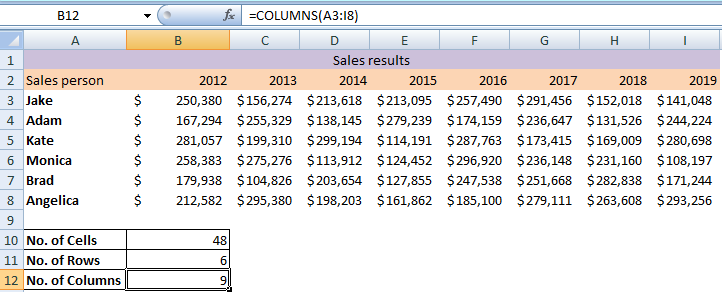
For our example, we will create a table of different salespersons and achieved sales in the period from 2012 to 2019:

We will consider our data starts from cell A3, and finishes with cell I8, so our range will be A3:I8. To calculate the number of cells, rows, and columns in our range, we will use COUNT, ROWS, and COLUMNS formulas, while inspecting our range. These are our formulas:
|
1 2 3 |
=COUNT(A3:I8) =ROWS(A3:I8) =COLUMNS(A3:I8) |
All of these formulas have only one parameter: the range or values that need to be inspected.
We will insert these formulas in cells B10, B11, and B12, and will end up with the following results:

Size of the Range in Excel
As already stated, the objective view of the range size is to check its height and width. We can use VBA to verify these numbers.
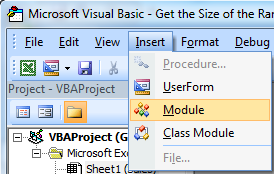
First things first, we will open the VBA, by clicking ALT + F11 on our keyboard, and then going to the Insert tab and choosing Module:

Height and width are measured in points. We will only create a code that will present these two metrics on a message box. This is our code:
|
1 2 3 4 5 |
Sub Range_Width_Height() Dim k As Range Set k = ActiveSheet.Range("A3:I8") MsgBox "Width of our range Is " & k.Width & " And the height Is " & k.Height End Sub |
This is what our code looks like in the VBA:

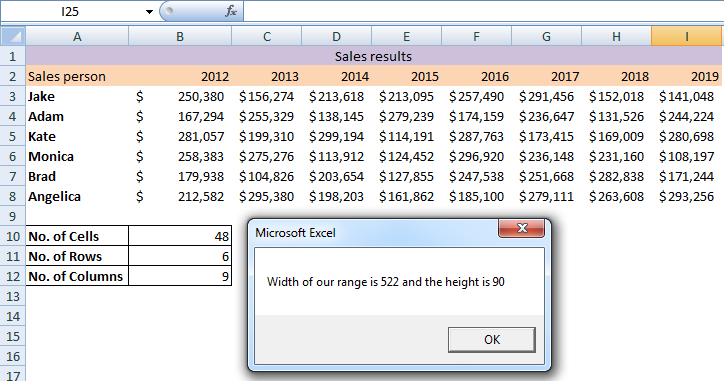
This code defines our range, and then it provides its two values: width and height. When we execute the code by pressing F5 on our keyboard, this is the message that we get:

Showing us the needed results.
