Everything that we do in Excel can be manipulated. There almost does not exist an option that you can think of, that cannot be done.
Manipulating the header and footer is no different. In the example below, we will show how can you insert a file name in a footer.
Insert File Name in Excel Footer
The name of our file will be the same as the title above. We will insert a random numbers table in our file, just not to leave it empty:

After that, we will go to the Insert tab, go to Text, and then choose Header & Footer:

When we click on this option, our view will automatically be changed to Page Layout, with options to add a Header and Footer. We will also be presented with Header & Footer tab:

There are multiple options under this tab, and most of them are intuitive and self-exploratory. To switch to the Footer, we will simply go to Navigation and choose Go to Footer:

We will be directed to the Footer, and will choose File Name as an option under Header & Footer Elements:

This option will add the file name to the header or footer, depending on where we want it. After we click, this is the picture that will appear:

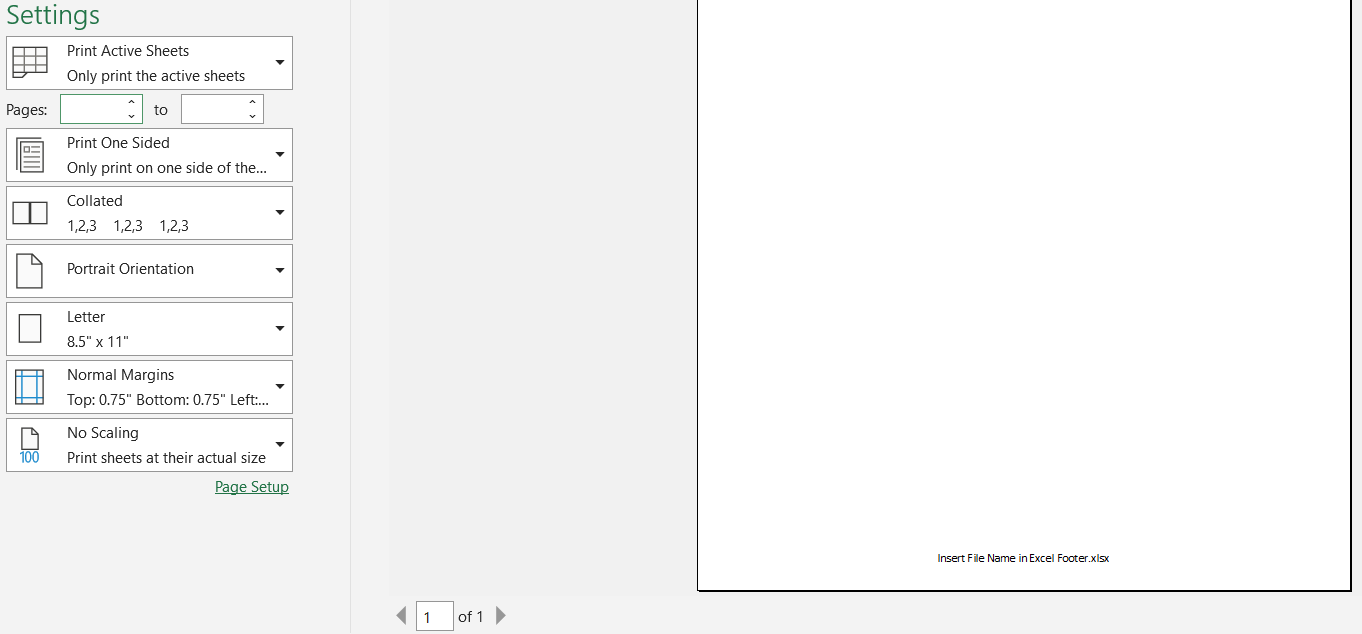
Which is an indication that the file name is in our Footer. When we go to the Print Preview now (File >> Print), we will see the name of our file in the Footer:

