In the lesson about inserting rows and columns, I presented how you can insert a new row in Excel. Here, I will show you how you can add a new row with VBA.
Creating a macro
You don’t have to remember the code which will allow you to insert a new row. In this example, we will use the macro recorder and cut the code that will be useful for us.
First, click the button to record a macro.
Name your macro and click OK. Right-click any row number and choose Insert. Stop the macro.
Executing the macro
Go to VIEW >> Macros >> Macros and open the macro window. Choose your macro and hit Run. As you can see a new row is inserted into the worksheet.
CAUTION
When you use a macro to insert a new row, you can’t use undo (Ctrl + Z).
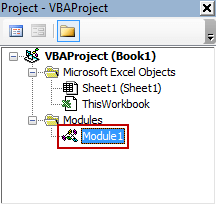
Use Left Alt + F11 to open the VBA code window. Double-click the module icon from Project Explorer (if you can’t see it, use Ctrl + R).
Analyzing the code
Take a look at the following code.
|
1 |
Selection.Insert Shift:=xlDown, CopyOrigin:=xlFormatFromLeftOrAbove |
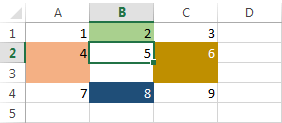
- Selection.Insert Shift:=xlDown shifts down the data from the selected cell(s) and from the cells below.
- CopyOrigin:=xlFormatFromLeftOrAbove uses the formatting from the cell above or from the cell to the left. xlFormatFromLeftOrAbove takes one of two values, 0 or 1. 0 is the default. So you can also write CopyOrigin:=0 or even drop the code. It will use the formatting from the cell above by default. If you want to get rid of the formatting use CopyOrigin:=1
This code will only insert a new row when you click the row number. If you use it on a cell It will shift down data inside this cell.
If you want the macro to work in a way that it will be adding a new row not only when you choose a row letter, but also any cell inside this row then you can use the following code.
|
1 |
ActiveCell.EntireRow.Insert |
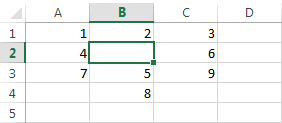
If you want to insert a row above the selected cell, use offset.
|
1 |
ActiveCell.EntireRow.Offset(1, 0).Insert |
It will give you the following result.