In Excel, you can save a file using the VBA code. You can do it by specifying the path and name of a file in code, or by opening Save As window.
In this tutorial, I’m going to show you both ways.
A quick way to save a file in VBA
You can quickly save an XLSX file using this single line of code. In this case, you have to give a path and file name where the program should save the file.
|
1 2 3 |
Sub saveFile() ActiveWorkbook.SaveAs Filename:="D:\temp\myFile.xlsx", FileFormat:=51 End Sub |
In this code, the file name is given with the XLSX extension. You can drop it because there is specified the file format code: 51. This code means that the file will be saved in this format.
Open the SaveAs window
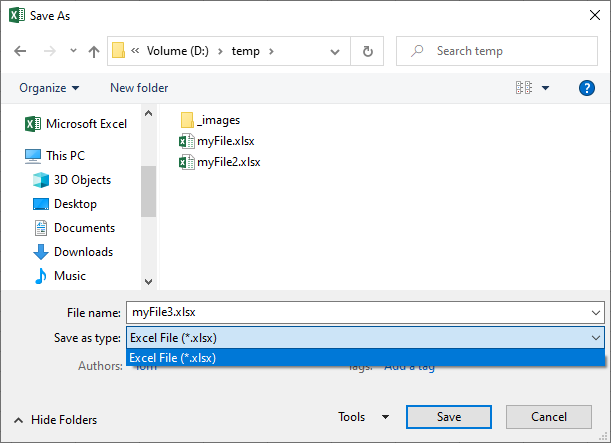
If you don’t want to place the name of the file in code each time you run the script, you can open a SaveAs window asking the user for the name and path.
|
1 2 3 4 |
Sub saveFile() save_name = Application.GetSaveAsFilename(fileFilter:="Excel File (*.xlsx), *.xlsx") ActiveWorkbook.SaveAs Filename:=save_name, FileFormat:=51 End Sub |
This is the same window when you saving an Excel file for the first time or using Save As to choose a different name.

Display information after successful save
If you want to be sure that the file is saved correctly, you can display a box with the success message and file path of the file location.
|
1 2 3 4 5 6 7 |
Sub saveFile() save_name = Application.GetSaveAsFilename(fileFilter:="Excel File (*.xlsx), *.xlsx") ActiveWorkbook.SaveAs Filename:=save_name, FileFormat:=51 If save_name <> False Then MsgBox "Save as " & save_name End If End Sub |
After you run the code, the Save As will appear. Save the file to display the message.

