Everything that you do in Excel, manually or using formulas, can be done in VBA. People are sometimes reluctant to use VBA as they consider that they would go through a lot of trouble to achieve the same results as they would by doing the task manually.
However, you should remember that it is always useful to use VBA, as you can store your code and use it again if you will repeat a certain action.
In the example below, we will show how can you sort the data by date in VBA, and why would this approach is useful.
Sort a Column With Dates Without a Header
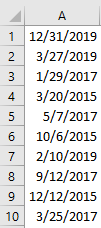
For the first example, we will use a random set of dates, ranging from 3/20/2015 to 12/31/2019:
To sort these dates from oldest to newest without using VBA, we would insert one more row instead of existing data in row number 1 and would go to Data >> Sort & Filter >> Filter.
If we want to do this by code, we need to open the VBA first. We will click on the ALT + F11 combination on our keyboard, and then choose Insert >> Module on the window that appears:

On the window that appears, we will insert the following code (one line of code):
|
1 2 3 |
Sub SortDateColumnWithoutHeader() Range("A1", Range("A1").End(xlDown)).Sort Key1:=Range("A1"), Order1:=xlAscending, Header:=xlNo End Sub |
We define the range that we want to sort. We put the Range A1 as a key to define the column that will be sorted, we define ascending order (that will be from oldest to newest, in our case, as the older dates are just smaller numbers), and we confirm that we do not have a header. For the last option, even if we have not put in anything, it would still default to no as an option.
This is what our code looks like in the module:

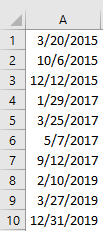
When we execute it by pressing F5 while in the module, this is the result that we will get:
Sort a Column With Dates With a Header
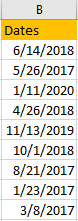
In column B, we will create another set of data with random dates:
This is the code that we will insert in the VBA:
|
1 2 3 |
Sub SortDateColumnWithHeader() Range("B1", Range("B1").End(xlDown)).Sort Key1:=Range("B1"), Order1:=xlAscending, Header:=xlYes End Sub |
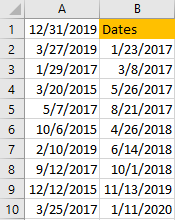
In this code, the only difference is that we defined the Header to be excluded from the sorting order. When we execute the code, this is what we end up with:
Sort Data by Date with Double-Click
There is also a very neat way to control the ordering of the columns by double-clicking on the column header.
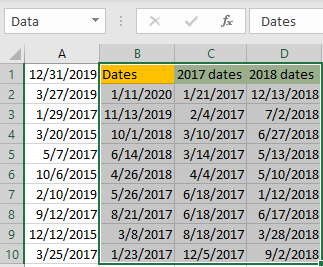
We will add two more columns to our worksheet, which will be random dates in 2017 (in column C) and 2018 (in column D). Then we will give the name to this range (B1:D10) and call it simply “Data”. We do that by selecting the range and changing its name in the Name box:
Then we will use this in our actual code, which will go like this.
|
1 2 3 4 5 6 7 8 9 10 11 |
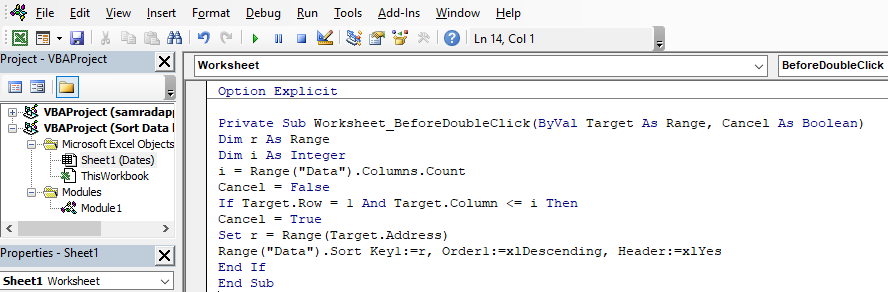
Private Sub Worksheet_BeforeDoubleClick(ByVal Target As Range, Cancel As Boolean) Dim r As Range Dim i As Integer i = Range("Data").Columns.Count Cancel = FALSE If Target.Row = 1 And Target.Column <= i Then Cancel = TRUE Set r = Range(Target.Address) Range("Data").Sort Key1:=r, Order1:=xlDescending, Header:=xlYes End If End Sub |
This code works in our sheet, so it is important to copy/paste it into the sheet which we want to manipulate, whereas our previous codes were in the module:
This code first declares two variables, r as Range, and i as Integer. Then it sets the i variable to be equal to the total number of columns in our data set. As we already have two variables (Target as Range and Cancel as Boolean defined in the subroutine sentence declaration) we set Cancel as False.
If the function is there to see if a row is equal to 1 and if the column is in our data set. Then we set variable r to be the address of our target variable.
The last part is to define the order of the column that we will double-click on.
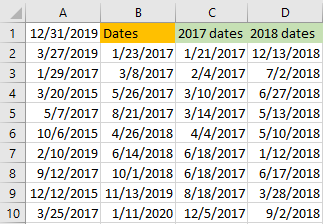
When we double click on any of our columns, in our case column C, for example, the data in this column will be shown in descending order:
If we want to change the columns that can be changed with this code, all we have to do is change the range that we encompass.