AutoFill is a very useful Excel feature. It allows you to create entire columns or rows of data that are based on the values from other cells. In other words, Excel compares the selected data and tries to guess the next values that will be inserted.
AutoFill months and days
Example 1:
Look at the following example. In cell B2, there is the word- “January”. Excel automatically recognizes it as the first month. Click this cell to activate it. Move the cursor to the bottom right corner so that it will change to a small black cross.
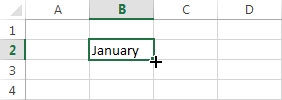
Drag your cursor to cell F2. As long as you hold down the mouse button, Excel shows you which month will be inserted into the last cell in a small rectangle.
AutoFill works both vertically and horizontally
TIP

Release the key to insert the values into the cells.

Example 2:
You can use AutoFill, starting from any list item- not necessarily the first. See how it works in the following example, with days of the week.
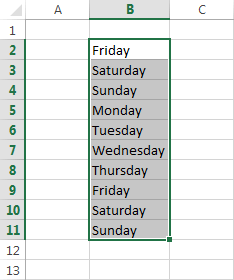
Notice that when the list reaches the end, Excel starts to insert new elements, starting from the beginning of the list.
AutoFill numbers
Auto-filling numbers is slightly different than filling data that is saved in the defined lists. If you put a number and use the AutoFill feature, Excel will fill all selected cells with the same value.

If you want each next number to be incremented by one- compared to the previous one, you can perform the same operation as before, but this time holding down the Ctrl key.

You can also use AutoFill to insert lists of odd and even numbers, tens, etc. In this case, you must select at least two cells with the values.
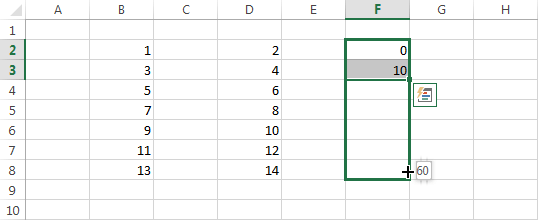
Unfortunately, Excel can handle only simple examples. If you have more complex ones, the result probably won’t be the one you expected. So be careful when you use this feature.
CAUTION
Example:
Look at the following example. Suppose that you want each next number to be the sum of all the previous ones. You entered the following values: 1, 1, 2, 4, 8, 16.
If you select these values and use the AutoFill feature to fill the other cells, you will see that Excel has treated them in a completely different way.
AutoFill hours
Using AutoFill on hours works in the same way as using it on numbers. Look at the following example.

This time, you also have to select at least two values to fill the rest of the cells.
Creating Custom Lists
You might often use a list of items that are not defined in Excel. For example the list of your employees.
To create such a list in Excel, go to FILE >> Options >> Advanced >> General >> Edit Custom Lists.
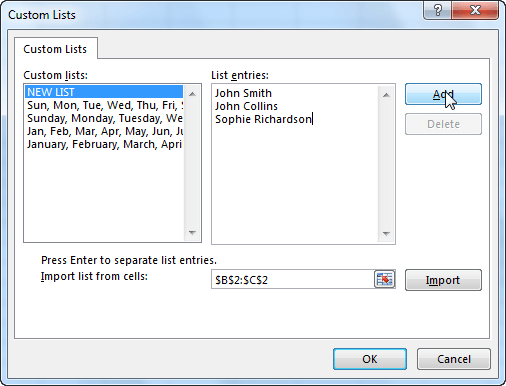
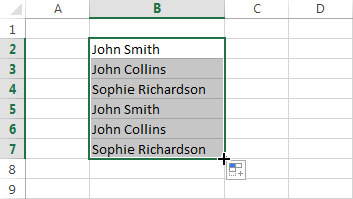
After you add your custom list, you can use it in the same way as the ones defined by Microsoft. Just type one of the values from the list, drag the mouse cursor and Excel will complete the rest.
Excel 365 Update
- Formula by Example: This functionality, introduced in Excel 365, intelligently detects patterns in how you fill a series of cells manually. It can then suggest automatically filling the entire column with a formula that replicates the pattern. This can significantly reduce the need to manually enter complex formulas, especially when dealing with progressions or sequences.
- Flash Fill: While not entirely new in Excel 365 (introduced in Excel 2013), it’s worth mentioning as it automates filling data based on a recognizable pattern. Excel can analyze existing data and intelligently propose how to fill the remaining cells based on the identified pattern.
- Improved AutoFill Options: While the core functionality of extending data series (numbers, dates, text) remains similar, Excel 365 offers more control over the AutoFill process. You can access a wider range of options like filling without formatting, filling weekends and weekdays, and more.
