Visual Basic for Applications (VBA) allows us to automate every aspect of our work in Excel. This can relate to any level that we are in, whether we talk about the application as a whole, a certain workbook, or a particular sheet.
In the example below, we will show how can we manipulate Excel on the application level with VBA to create and save a new workbook with VBA.
Create New Workbook in Vba
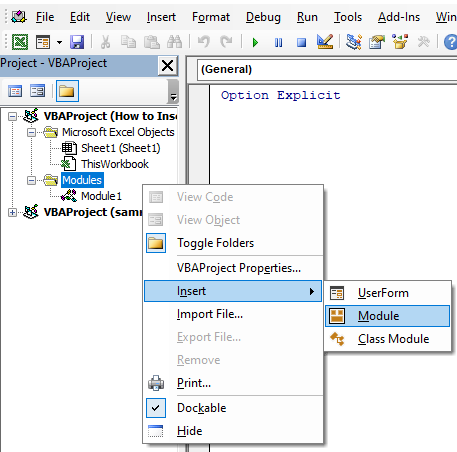
To access the VBA module, we will click the combination of ALT + F11 on our keyboard. On the window that appears, we will right-click on the left side, and choose Insert >> Module:

On the right side of the module, we will insert the following code:
|
1 2 3 4 |
Sub Add_A_Workbook() Dim wb As Workbook Set wb = Workbooks.Add End Sub |
What this code does when we run it, is that it automatically adds another workbook, opens it, and then automatically positions us to this new workbook.
Save New Workbook in Vba
We need to add another line in our code to save the new workbook. This will be the line:
|
1 |
ActiveWorkbook.SaveAs Filename:="C:\Users\Harun\Desktop\Mybook.xlsx" |
As the newly created workbook will automatically be active, we will simply save it, but we will also define the file name (Mybook), Location (Desktop), and type of the file (xlsx). This is what our code looks like in the module:

When we run the code by pressing F5 while in the module, a new workbook will automatically be added and saved on the desktop, with the “Mybook” name:

Choose a Folder for Saving New Workbook
There is an additional way to save the new workbook, i.e. to allow us to choose a destination folder. This will be the code for that purpose:
|
1 2 3 4 5 6 7 8 |
Sub Choose_A_Folder_For_New_Workbook() Dim wb As Workbook Set wb = Workbooks.Add Dim ws As String ws = Application.GetSaveAsFilename(InitialFileName:="Default", _ filefilter:="Excel Files(*.xlsx),*.xlsx,Excel-Macro Files (*.xlsm),*.xlsm") wb.SaveAs ws End Sub |
This code declares an additional variable called ws, as a string, and then it calls for the GetSaveAsFilename option, which has several parameters. For our example, we decided to go with InitialFileName and filefilter parameters, in which we declared the initial name and possible types in which the file can be saved.
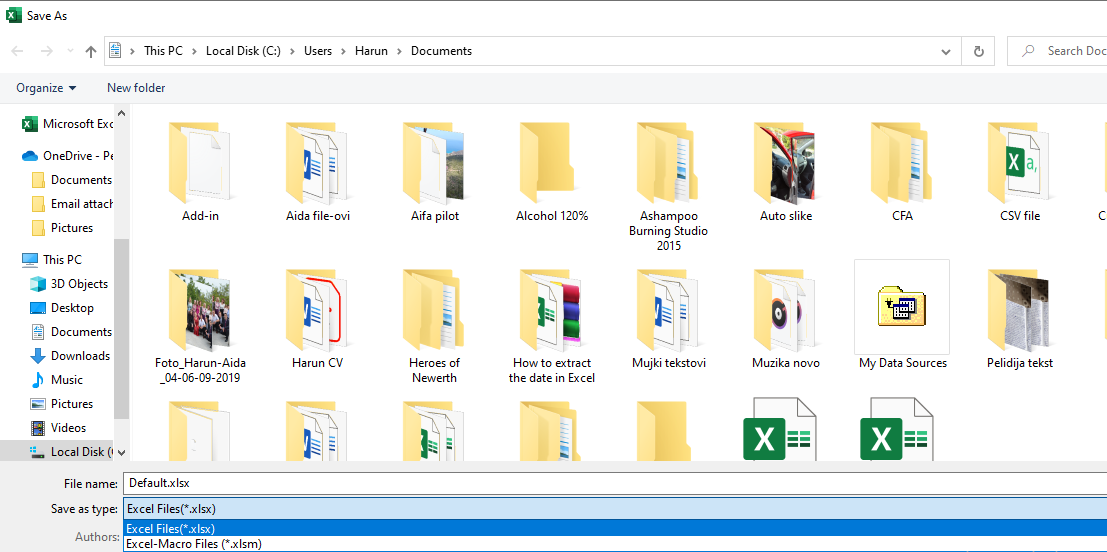
When we execute the code, this is the window that we will see:

It is noticeable that we are now prompted to default Office folder when saving files (Documents) and that we can save our file as a .xlsx file (Excel Workbook) or .xlsm (Macro Enabled) file. Our file name is equal to “Default” which we also defined in the code. We can change it to our liking.
