You probably already know that VBA (Visual Basic for Applications) is an amazing tool to use to automate processes in Excel. It is also a great tool to help potential users do various things.
In the example below, we will present how to format any given column as text with the help of VBA.
Format Column as Text with VBA
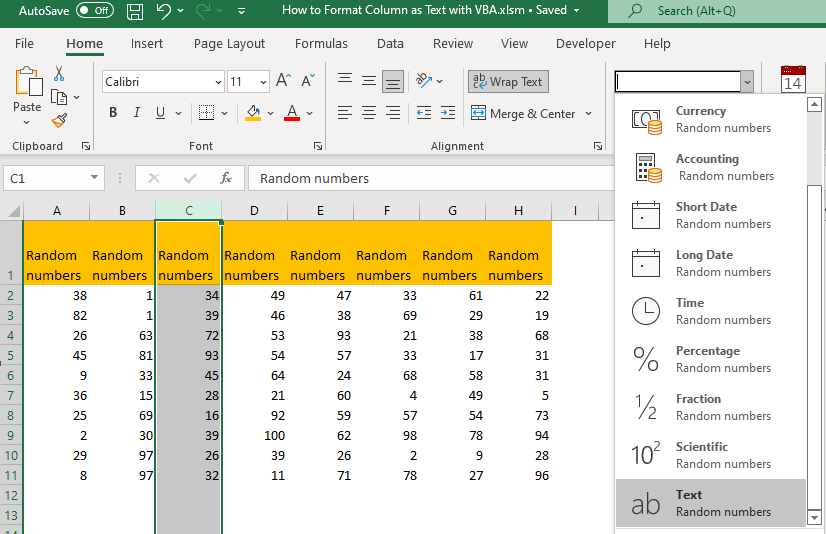
For our example, we will input random numbers from 1 to 100 in range A2:H11:

To format any of these columns as Text manually, we need to select any column (for example column C), then go to the Home tab and in Numbers sub-section choose Text on a dropdown:
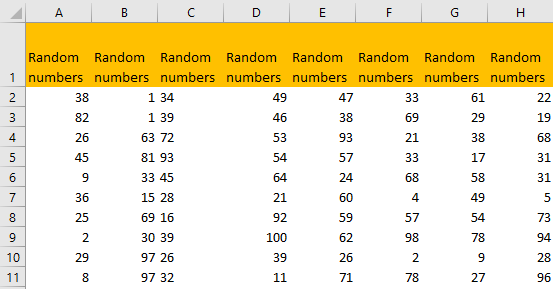
Now our table with random numbers looks like this:
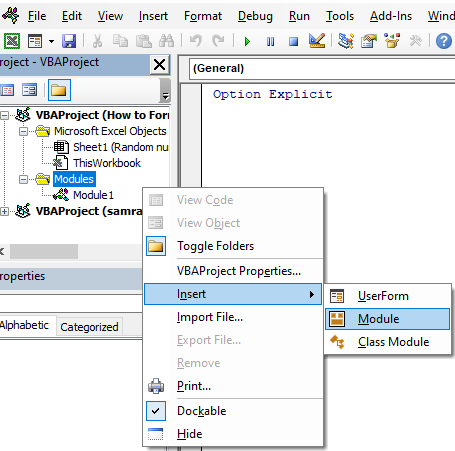
Let us now try to do these steps, but by using VBA. First thing first, we need to access the module by clicking the combination of ALT + F11.
Once in the module, we will right-click on it and choose Insert >> Module:
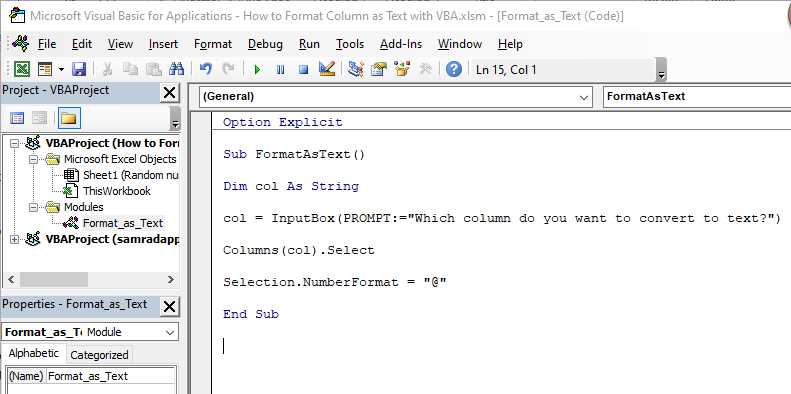
When we click on it, we will input the following code on the right side of our screen:
|
1 2 3 4 5 6 |
Sub FormatAsText() Dim col As String col = InputBox(PROMPT:="Which column Do you want To convert To text?") Columns(col).Select Selection.NumberFormat = "@" End Sub |
This is what our code looks like in the module:
What our code does is it first creates a “col” variable and then declares that variable to be equal to the answer or the user on the question below:
|
1 2 |
Dim col As String col = InputBox(PROMPT:="Which column do you want to convert to text?") |
Then we select the column that the user wanted to change and change the format of that selection (that column) to text.
|
1 2 |
Columns(col).Select Selection.NumberFormat = "@" |
Now, our code has a significant error, and that is it will simply fail if the user clicks something other than an actual column name, but for the sake of this exercise, we will presume that our user knows what we are talking about.
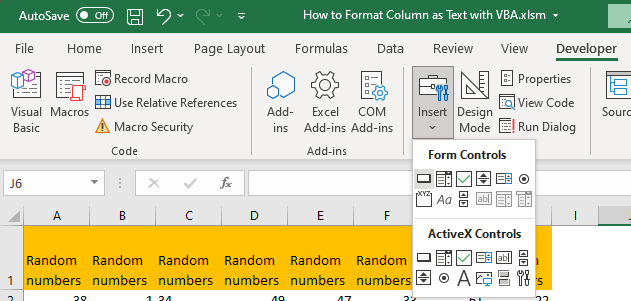
We will now add our code to our sheet by going to it, and then going to Developer tab >> Controls >> Insert >> Form Controls >> Button (first option available):
We will then insert the button next to our table. As soon as we set the destination, we will be presented with the following window:
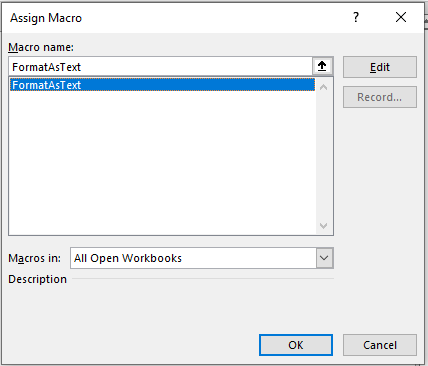
We will assign our existing macro (FormatAsText) to our button, which means that we will be able to run our macro by clicking on our button.
We will change the name of our button to “Format as Text”.
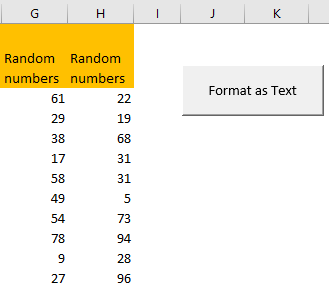
Now, when we click on this button, our code will be executed. The first thing that the user will see is the pop-up window with the question we defined:

We will choose column G, for the sake of the exercise.
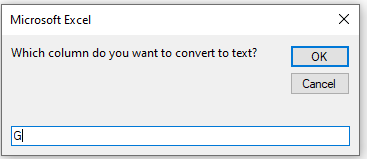
When we click OK, we will see that our column G has been formatted:
