Deleting a value inside a cell is easy, just click a cell and press delete. But how you can delete a cell that has no value, in other words, the blank cells?
In this lesson, I’m going to show you how you can remove blank cells.
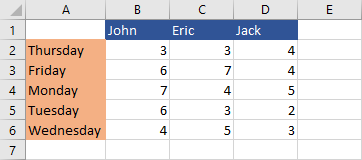
Take a look at the following example, where you have a list of values with some empty cells.

Selecting blank cells
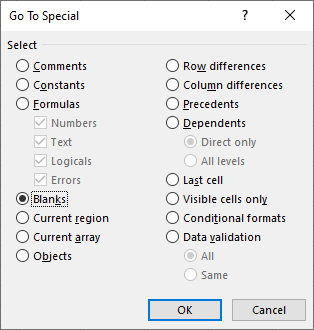
First, you have to select a range of cells and then navigate to Home >> Editing >> Find & Select >> Go to Special. From the Go To Special window choose Blanks and click OK.
All the blank cells are now selected (A1, A4, A6).
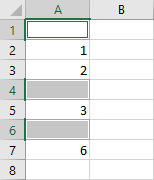
Now, navigate to Home >> Cells >> Delete >> Delete Cells. Alternatively, you can use a keyboard shortcut: Ctrl + –.
A new window has 4 radio buttons.
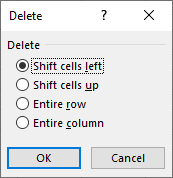
In our example, we can use both Shift cells up and Entire row. After you click OK, the empty cells will disappear, leaving only cells with values.
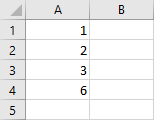
Shift cells up
In this example, you have three people with the number of hours they worked.

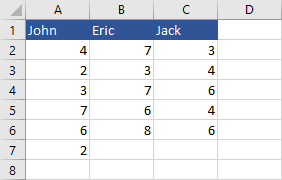
You can use Shift cells up to move all cells that have values into places of empty cells.
Select all the cells, then choose blanks.
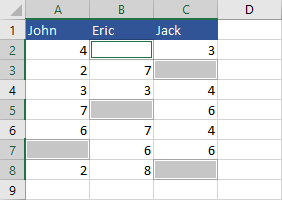
Use Ctrl + – to open the Delete window. Choose Shift cells up and click OK.
Entire row
You can also delete the entire row of cells. You have to be careful here because any blank cell inside a row will delete the entire row.
Take a look at the previous example. What happens if you choose Entire row.
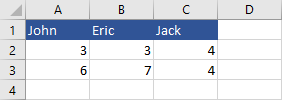
Only two rows left. Because in rows 4 and 6 there were no blank cells at all.
Let’s take a look at another example:
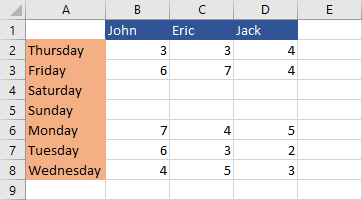
There are three people again, but this time we have a table with the number of hours worked on workdays. On holidays nobody worked, so let’s get rid of these rows.
Select cells from A2 to D8, choose blanks, and then delete Entire row. It’s important not to select the first row because cell A1 is empty and it will result in deleting the header.
After this action, you are going to get a table without Saturday and Sunday.
